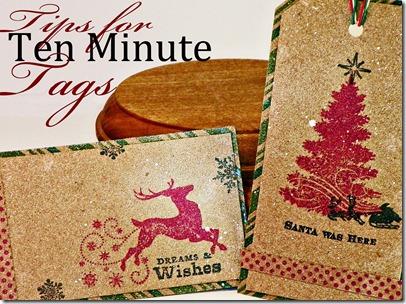
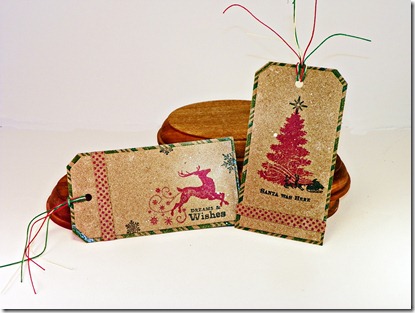
Hello pink paper people! I’m here with another Party Time Tuesdays! challenge. AND I wanted to give you some tips on how to speed up the process of making gift tags that look impressive, but take you almost no time at all!
The Challenge:
Tags
The Inspiration:
The Tips:
#1: Decide on all your supplies before you start.
- When you are crafting for the holidays, time is usually not your friend. The key to making the most of the time you have to craft for the holidays is to make the whole process more streamline. When you narrow the options for paper, stamps, and tools you eliminate the time it takes for you to make each individual decision.
For example: If you are making twelve tags, choose a group of six papers, three wood mounted stamps, one tool and one clear stamp set. Do not deviate from these supplies when you begin making your tags.
#2: Restrict yourself to only a few colors.
-It is easy to get caught up in all the amazing colors and patterns available for holiday crafting. You might want to make every tag different in theme, color, and design and that’s awesome! But, you’ll find that the time you spend on that might be more than you bargained for. So, look briefly through your supplies and ask yourself – “Self, what product do you LOVE the most this year?” When you have answered that question, choose a few colors (try for one neutral and no more than three other colors – one base color, like white, cream, and kraft you get for free!) and mainly choose supplies that go with that color scheme.
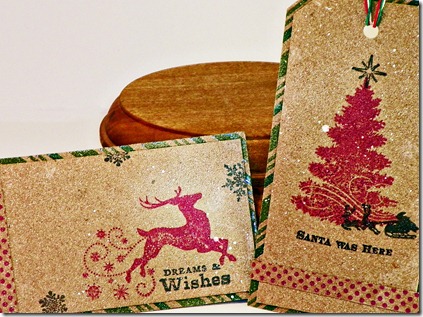
For example: The paper I chose for these tags was kraft with traditional red and green patterns. I decided that I would go with red (color 1) and black (neutral) for my ink and then chose a green (color 2) printed paper as my main patterned paper base. And (you’ll notice a theme starting!) Do not deviate from these colors.
#3: Get familiar with batch tasking.
-If you’ve never heard of batch tasking before, here it is, in a nutshell: it is the opposite of multi-tasking. Batch tasking is an old concept with a new buzz-word nick name. Basically, instead of trying to make something from start to finish, creating each little detail as you go, you group each step and completely finish before moving on to the next. The reason it works has to do with, what I like to call, “The Satisfaction Factor”. The more you feel you’ve accomplished, the more accomplished you feel. (AND if you don’t have time to do everything in one sitting, batch tasking allows you to walk away temporarily before a project is finished and still feel like you came to a good stopping point!)
For example: When I was making my tags I batched my tasks. First I made both tag bases, then both tags and then PUT THOSE TOOLS ASIDE. Then I stamped everything I wanted to stamp on both tags and PUT THOSE TOOLS ASIDE. I punched both holes at the same time and finished both tags with the hemp twine and PUT THOSE TOOLS ASIDE. I was able to speed up my productivity and keep my workspace organized without sacrificing quality in my final product. (And, as always) Do not deviate from your system no matter how tempted you might be. ; )
#4: (The most IMPORTANT tip) Don’t be afraid to throw the rules out the window. In fact, just don’t be afraid.
-The most important thing about crafting is that it’s fun. You create homemade things for the holidays because you love to craft and it gets you in the spirit of the season to make pretty things that celebrate your family and your life. If these tips make that creative process torture for you – don’t do them. These tips are not the “right” way to make quick tags – they are MY way to make quick tags that make ME happy.
(“But, BRITT, you said Do not deviate!”)
Well, yes, that is true. But, take everything I say with a grain of salt. When I was in college studying music and theatre, there was one idea I learned that has applied to almost every aspect of my life. Learn the basics. Learn the basics so well that you can say them, do them, act them, and sing them in your sleep. And only then, when you hold those basic ideas in the palm of your hand, can you begin to bend and mold them into something different. Only then, can you become the artist that you have the potential to be.
For example: When I was done with my tags, after I had narrowed my products, chosen my colors, and batch-tasked my assembly, I had some pretty cool tags that I was really happy with. I picked them up and started to walk out of the room toward my camera – and then I spotted it. That brand new Studio Calico Mr. Huey white mist bottle was calling my name. It wasn’t part of the plan. It wasn’t even one of my original chosen colors (I’d already used my “free” choice: kraft). But something in me, a little voice, told me ‘just do it.’ I held the mist up in front of my tag, knowing it might be a bad decision, and misted without fear. That little voice, is the artist. And she is fearless.
So, whatever “basics” work for you and make you happy, hold onto them, memorize them, and let them give you focus. Then, spray the mist, be fearless, and Do not deviate.
Oh yeah, and keep it royal people. ; )
--------------------------------------------------------------------
(Like what you see? Please visit my sidebar, follow me, friend me and, if you REALLY love it, Pin it!) >>>>>>>>>>>>>


Excellent tips! Thank you.
ReplyDelete